# draft yml code courtesy of Gemini
      - name: Send mail
        uses: dawidd6/action-send-mail@v3
        with:
          server_address: smtp.gmail.com
          server_port: 465
          username: ${{ secrets.EMAIL_USERNAME }}
          password: ${{ secrets.EMAIL_PASSWORD }}
          subject: New commit pushed to ${{ github.repository }}
          body: "New commit by ${{ github.actor }} on branch ${{ github.ref_name }}. The commit message is: ${{ github.event.head_commit.message }}""
          to: recipient@example.com
from: sender@example.com23 Playing with GitHub Actions
Acknowledgments
Gemini was used to draft the GitHub actions used in this exercise.
Introduction
Today we will put what we’ve learned regarding GitHub Actions into practice. I’ve provided some starter code for you here.
Email notification on push
Our first action will be to initiate an email notification each time a new commit is pushed to a repository.
Setup
This exercise assumes you have Gmail and GitHub accounts. We’ll need to set up some secrets on GitHub, but first we’ll need an app password for your Gmail account. App passwords are not recommended unless you are unable to log in using Google’s web-signin protocol. That is not an option in this case, so we’ll start with setting up the app password.
- Create an app password on Google: https://myaccount.google.com/apppasswords
- Open the settings on your forked repository
- Navigate to
Secrets and Variables > Actions - Create the
EMAIL_USERNAMEandEMAIL_PASSWORDsecrets
- Navigate to
Create GitHub Action yaml file
Open the repository you just forked and:
- Navigate to the Actions tab
- Click “Configure” under the Simple Workflow option
- Change the name from “blank.yml” to something more appropriate
- Change the
namefield to match - Remove the
on: pull-requestoption, as we’ll only be triggering notifications on push - Remove the
workflow_dispatchitem, as this is less helpful for this particular application - Change the
buildworkflow underjobstosend-email - Under
stepsadd the code below with the following modifications:toshould list the email where you would like to be notifiedfromshould list the sending email - use the same email we set above
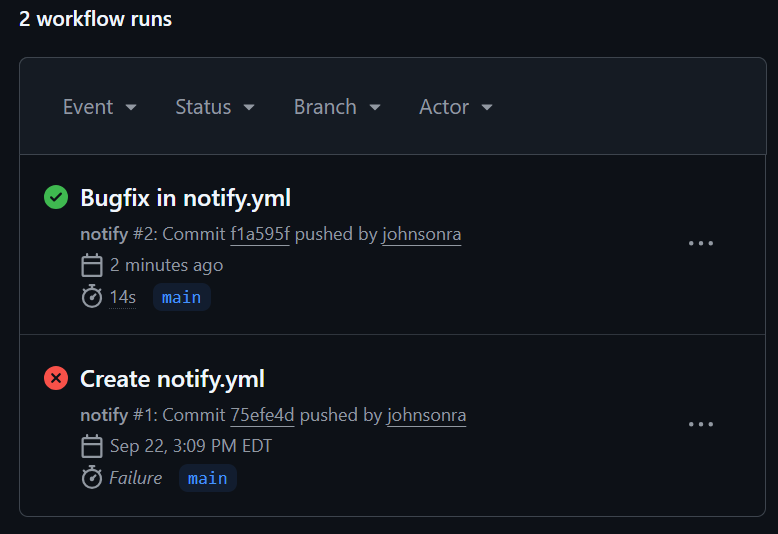
Once you push this, you should see a list of all workflow runs under your Actions tab.
Automated documentation
Next we will incorporate a GitHub action that will automatically render the documentation in our README file whenever it is updated. The setup for this is much simpler than the previous exercise, as it doesn’t require any secrets for interacting with outside services.
Create the GitHub Actions yaml file
Navigate to the Actions tab of your repository. You should see your existing workflow from the previous section.
- Click on “New Workflow” on the left
- Select the “Simple Workflow” option
- Copy the following code into the yaml file:
# draft yml code courtesy of Gemini
name: Render README

on:
  push:
    paths:
      - 'README.qmd'
  workflow_dispatch:

jobs:
  render-quarto:
    runs-on: ubuntu-latest
    permissions:
      contents: write
    steps:
      - name: Check out repository
        uses: actions/checkout@v4

      - name: Set up Quarto
        uses: quarto-dev/quarto-actions/setup@v2

      - name: Render README.qmd
        uses: quarto-dev/quarto-actions/render@v2
        with:
          to: gfm
          path: README.qmd

      - name: Commit changes
        run: |
          git config --global user.email "github-actions[bot]@users.noreply.github.com"
          git config --global user.name "github-actions[bot]"
          git add README.md
          git commit -m "docs: Render README.md from README.qmd" || echo "No changes to commit"
          git push
Edit README.qmd
Once you have created the workflow, we’ll test it out by updating README.qmd.
Option 1: Edit locally
- Install Positron (and maybe Quarto? - I think this will work without having to install Quarto locally)
- Clone your repository to your local computer (e.g. using GitHub Desktop)
- Open the repository in Positron
- Start up Positron
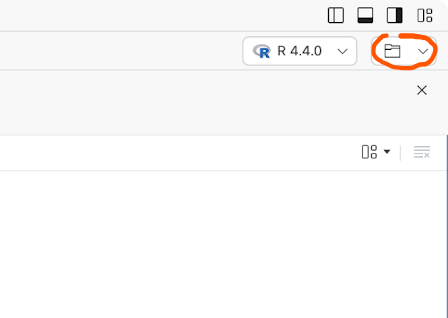
- Use the folder selection tool in the top-right corner to open your repository
- Open README.qmd
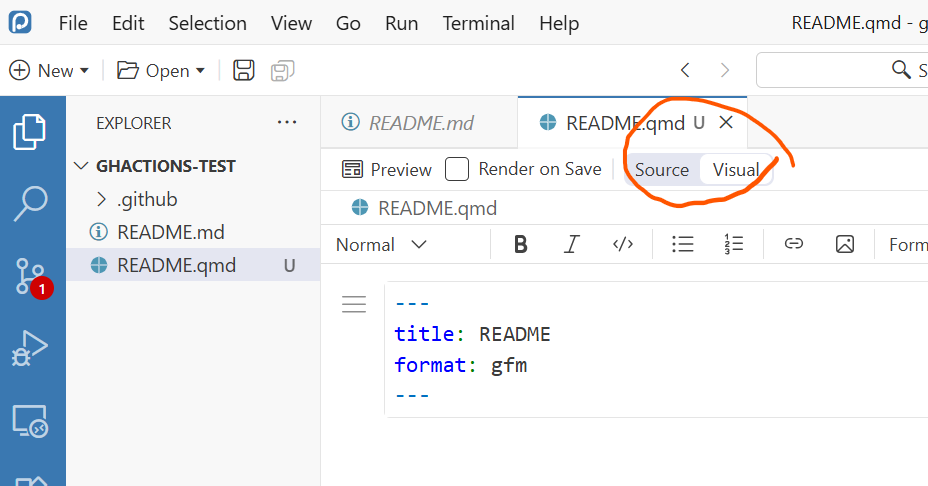
- Switch to Visual mode
- Add some formatted documentation to your README describing the purpose of this repository
Option 2: Edit on GitHub
- Open
README.qmdon GitHub in edit mode and add some text. You can include makrdown formatting, but this option is less intuitive than the visual editor in Positron. - Save and commit your changes.
Commit and Verify
- Commit and push your changes to GitHub (if you used option 2, you’ll be commiting them directly on GitHub, so no push is neccessary)
- Check your Actions tab to verify that your workflow completes successfully
- (Your push should have activated two workflows)
- If it completed successfully, navigate to the main page for your repository to visually inspect your README output.